Wednesday, December 30, 2015

Navigating the Scrapbook Grid

Welcome, Club Scrap Navigation Blog Hoppers!


The photo of Marilee has nothing to with the Navigation theme of the collection, however, I just like the color and style . . . so it works!

Simply trim a series of 1" squares from assorted papers in the collection. Crop a 5x7" photo to 5x6" and trim into 1" squares. Be sure to layer everything with several mats in contrasting colors and anchor the grid element with gold-edged satin ribbon.


The CS Grid Ruler is critical for maintaining equal spacing between 1" squares.


Apply a few dabs of adhesive from Club Scrap's handy Glue Pen to adhere the squares.


And finish up with a few embellishments from your stash.


Thank you for hopping with us. Next up is Debby at Masculine Inspirations in Paper Crafts.

Wishing you a very creative new year!
Kay

Saturday, December 19, 2015

Watercolor Christmas Blog Hop

Merry Christmas! Welcome to my merry stop on the Club Scrap Watercolor Christmas Blog Hop.

The artwork for this Club Scrap Collection was created by the talented watercolor artist Swarup Murthy The Storyteller. Her artwork transformed into a wonderful paper crafting collection. Tricia (our fearless leader at Club Scrap) has more information about how it all came to be HERE.

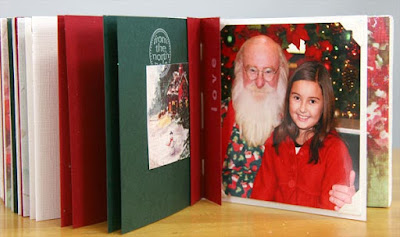
With lots of holiday spirit, I've created a 4x4 Canvas Stitched Mini Album using this unique collection.

Watercolor Christmas 4x4 Canvas Mini Album
The Watercolor Christmas papers are so pretty, it was actually hard to cut into them, however I'm so glad I did.


It's pretty cute filled with Christmas photos from the past, I just happen to have a few!


More photos below if you are interested! However, for now, next on the hop is Annette from Digital Musings, you'll have to go see what she is up to!
Wishing you a very Merry Christmas!
Kay


Since a picture is worth a thousand words, I hope this series of photos I took along the way helps!
Club Scrap's Watercolor Christmas Collection


Wednesday, November 25, 2015

Moroccan Spice Blog Hop

Welcome to my stop on the Club Scrap Moroccan Spice Blog Hop.


This month I created a greeting card with the Filigree Masking Stencil found in the Moroccan Spice Deluxe Kit. I topped it all off with a gorgeous Filigree Band from the Lite Kit.


Card assembly details . . .

Cut two panels from an old dictionary page to fit a 5x7" card base. Place one dictionary page into an empty Club Scrap shipping box. Cover the page with the masking stencil, and spray with colored mist. Repeat with the second panel and a contrasting color.


Trim the panels to fit onto a mat and layer onto the 5x7" card base. Add a sentiment from the Collection UM stamp sheet.


Now it's time to do some Dishing with Janet! If you'd like to see the entire list of hop participants, go back to Club Scrap.

Thank you for hopping with us!
Kay

Wednesday, October 28, 2015

Big Top Blog Hop

Welcome to my stop on Club Scrap's Big Top Blog Hop.

Today I've whipped up my own variation of a matchbox book. It's slightly larger than your standard matchbox measuring 3.25x5", but the inside resembles and works like a matchbox.

I'm going to let the pictures do the talking . . .


Wrapped matte board is used for the front, back and spine covers. 


Folded Big Top papers form the matchbox on the inside.


With the box being 3/4" deep, I have room for a mini album or just odds and ends inside. (If things weren't such a circus around here, I'd already have that mini album made!)


What a fun way to use the Big Top papers and stamps!

Next on the hop is Annette at Digital Musings.

Wishing you a creative day,
Kay

Wednesday, September 30, 2015

Transformations Blog Hop

Welcome to my stop on the Club Scrap Transformations Blog Hop.


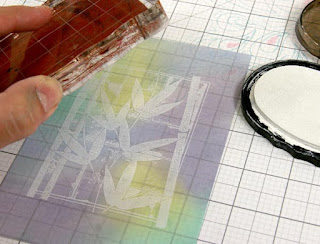
For me, a greeting card can simply be a thing of beauty to look at and enjoy. I decided to use the Transformations rubber stamps, along with white ink and pastel chalks to create a colorful panel for the front of a card. It is so pretty, you might just want to keep it for yourself!


How to create this card.

1. Use Pan Pastels and foam applicator to blend color onto Translucent Paper. Since skin oils from your finger tips can cause spots, use a scrap of paper to hold matte in place while applying pastels. Rub on color until matte is covered. I chose softer colors for my matte, but it would look just as pretty with bright colors. It's your choice!


2. Flip matte over so colored side is facing down. The colors will look more muted and blended on this side.


3. Use White Pigment Ink to rubber stamp onto the matte. The image I chose is from the Transformations Collection Unmounted Rubber. Trim the paper to fit the front of your card.


4. Attach the artwork with four decorative brads from your stash.


I hope you enjoy this quick and easy technique.

Next on the hop is Deb at Lift Bridge Cards and Crafts.

Thank you for stopping by,
Kay


Wednesday, July 29, 2015

Cantina Blog Hop

It's happy hour at the Club Scrap Cantina Blog Hop!


Welcome to my stop. Today I was inspired by Dairy Queen marketing. After picking up a frosty treat for my dear daughter and me, I noticed this cardboard cube tower next to the restaurant exit. It stood about as tall as I am. Since it could easily be converted to a tabletop variation using CS papers, I snapped a pic of it on our way out to remember the idea.

Dairy Queen Marketing

My photo cube variation of the Dairy Queen Marketing

Here are the pics I snapped during assembly using the Cantina Collection. I think I'll just let the pictures do the talking. For perspective, the matte board squares are cut to 3-1/2".


Lastly, the fun of adding photos and embellishing . . .


Next on the hop is the talented Debbie at Masculine Inspirations In Paper & Crafts.  You'll want to see what she is up to!

Kay at Club Scrap