Wednesday, March 27, 2013

Welcome Bookshelves Blog Hoppers!

Just like last month's blog hop inspired by the February Club Scrap Up, Up & Away collection, it's finally time for projects featuring Club Scraps March Bookshelves Kit.  It's so much fun to share and see what other talented crafting friends are doing!

I just couldn't help myself. Altered book time!


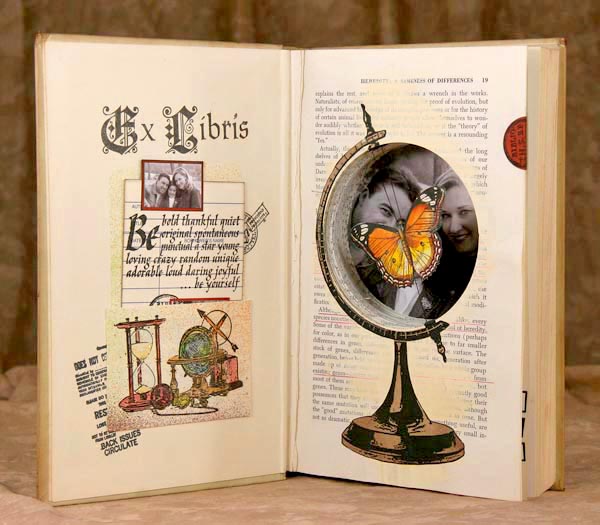
I used the Bookshelves collection to embellish this altered book purchased from a thrift store. You can see how crazy I went with the globe rubber stamp for making cards in the March Scrap Rap. But to create the jumbo globe on the inside of this book, I enlarged the Unmounted Rubber Stamps index sheet on the copy machine by 160%.


I carefully trimmed out two enlarged globe stands with a detail scissors.

Next, I cut the correctly sized circular nook into the pages with a circle cutter, working several pages at a time.


Once the circles were cut all the way through the book, I attached a photo to the inside back cover to show through the nook.


.
Then I attached the globe stand to the inside front page with a light application of CS Bookbinding Glue. I sort of held my breath while I did that!


I chose to suspend a butterfly into the open space of the nook, so I sandwiched thread between two butterflies. Next, I sandwiched the thread between two pieces of Eggshell paper from the kit and attached it between the first two pages of the book. 


The pre-sandwiching technique really helped with installing the butterflies. And you'll want to make sure that the thread lines up with the axis of the globe stand.


Check out how cool that looks!


I stamped images from  the Bookshelves Greeting Unmounted Stamps onto the Library Pocket goodie included in the kit. And the Library Card was the perfect thing for inside this pocket after I gave it the royal stamping treatment and added a photo or two!


For the cover, I stamped Bookshelves images onto Ivory paper, shaded them with colored pencils, and trimmed the whole works into inchies. Each inchie has a black matte to really make it pop.


Then I added a little more rubber stamping to the book . . .


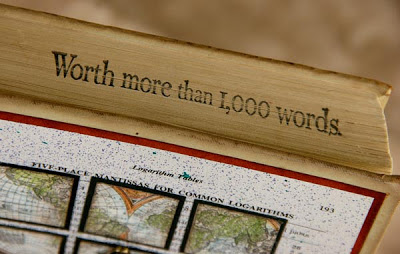
. . . onto the back cover and even the outside edge of the pages.


I suppose I've included way too many pictures, but I'm having a hard time stopping myself. It's just so much fun sharing!


Your next stop, on this blog hop, is the lovely and talented Cathy Grey's blog, The Artful Gamut.
Hop along now!


Kay

Saturday, March 16, 2013

Shadowbox Tin

Feeling crafting fortunate today, I submitted my shadowbox tin project to Paper Crafts Magazine for their Paper Crafted Creative Ideas For Every Season & Holiday publication, and here it is! in print! going on sale March 19th, 2013. Thank you Paper Crafts Magazine for including my project!!!


I was inspired to make projects with these fun black matte tins when we received them in the October 2012 Peacock Club Scrap kit, so one thing lead to another and I'm still wanting to make more!

This wasn't on purpose, but in the process of putting this shadow box tin together, I think I've crafted the world's smallest drawer!


Since the Black Matte Tins were a goodie in the Peacock Kit, I enjoyed doing projects with them for the Scrap Rap, but then I just kept making projects with this sweet little tin.


I'm going to let the pictures tell most of the construction story, but I started by cutting dividers from black book board.

Once the dividers were in place, I put together the teeny tiny drawers.


Here is the other mini drawer I made for the upper corner of the tin (perfectly sized for fortune cookie fortune storage).
Then it was fun filling in the other compartments with other odds and ends.
I decorated the lid by spreading a thin layer of Book Binding Glue and attaching a color photo-copy to it.


Then used sand paper to trim off the excess paper, followed up with a little brown ink on the edges to give that warm used & handled look.


While I'm talkin' tins, here is a photo tin I put together.


I used the same steps for attaching my photo-copied photo as the lid above. It's amazing how well rubbing sand paper on the edges works for trimming off the excess photocopy.


Lastly, I couldn't resist making an accordion album using Club Scrap's October Peacock Paper in at least one of the tins. Here it is.

With a little rubber stamping on the lid and some button embellishments, it's also really cute! What a different look than the other tins!

Thanks checking out what I've been up to. Wishing you an inspiring day!
Kay