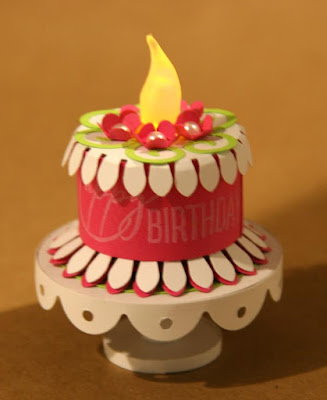
I created this miniature tea light birthday cake and miniature pedestal. Isn't it the cutest? This little project coordinates perfectly with the theme of Club Scrap's Surprise collection released this month.
It's just adorable when the tea light is turned on.
Here is a 6 second tour of this sweet little project:
This is a piece of cake to make!
Tips For Creating The Tea Light Cake
Cut decorative circles with a scalloped punch to create the base of the cake. Cut a Pink strip and create a loop to form the cake and to fit around a tea light. Adhere to the base with Bookbinding Glue dispensed from the Needle-tipped Applicator.
Place the tea light inside.
Make the cake topper with the same scalloped punch. Simply bend the edges around the cake sides and decorate with flower and swirl punches. Keep the cake top glue free for ease in turning the tea light on and off.
Tips For Assembling the Cake Plate with Pedestal
Cut circles from matte board and paper for the cake plate and pedestal base. Trim strips of white paper for the trim and pedestal assembly.
Cut a skinny strip of white paper to laminate the exposed matte board pedestal base.
Roll a strip of paper into a cylinder and secure with Bookbinding Glue to form the pedestal.
Create a decorative trim with scalloped edged scissors. Adhere to the perimeter of the cake plate with glue.
Glue the plate to the pedestal.
Have fun displaying this mini cake on this mini pedestal because it's all in the present-ation!
Did you like this project? Then you will love this little Birthday cake in-a-box! Visit the Club Scrap Blog for details.
Up next on the blog hop is Tricia Morris at her Efficient Crafter Blog!
Thank you for stopping by,
Kay


