Friday, February 24, 2012

Altered Book Music Box

This old discarded book made into a music box has been a thought rolling around in my head since my Music Box Project Class this year at the Club Scrap retreat. Finally it was time to put it together! AND glad I took the time! Now, this old book has become a cute little keepsake currently sitting on my coffee table. Also at Club Scrap, the Music Box Mechanism was available separately, so I had what I needed to get started. Crank it up and it plays "Fur Elise", love it!
On the inside, I cut three nooks from the inner pages. One large enough for the 2"x1-3/4" music box mechanism to go inside, then one for holding maybe photos or jewelry, and the smallest nook holds a little bottle.


I made the smallest nook more shallow to accommodate for a secret matchbox drawer below.


 Cutting a little nook into the pages behind the key hole hardware so the end of the key can fit inside seemed like a good idea too. Well, ya know, while your at it, you might as well do it right!
There is a hole drilled through the book's back cover to let the music box crank work freely.

Now for a couple pictures concerning the construction.
I started with the easiest step, stamping the front cover with the Vogue Love Is Eternity Stamp.

Then moved onto cutting the inside pages.

Along with all the cutting, I would have to say gluing all the pages together was my least favorite part, but still enjoyed the progress of each step and getting to decorate it in the end, and especially now that it plays music!!! Who else has an altered book that they can crank up? Anyone? Anyone?
I wish I could say I carved the heart with wings wooden pc that is now attached to the lid myself, but I happened to see it in the clearance bin at Michaels Craft store.  It was bare unfinished wood and attached to a frame, after it got it home I was able to use a large knife to free the glued on heart/wings from the frame. Then it just needed some acrylic paint and distressing before it embellished my altered book music box project.

The possibilities of book altering are certainly endless, and this was a really fun altered book to show you, hoping you like! 

I'm off to crank up my altered book.

Kay

Tuesday, February 14, 2012

Valentine's Day Cards

Happy Valentine's Day to you!!! Wishing you a sweeet day!
Valentine's Day is a very fun time for those of us that live in the paper crafting world, and I've enjoyed making a few Valentine Cards.
I made the card above using the fun Let Me Count The Ways remix UM, just today, in Club Scrap's Gotta Have More Dept!
Can't beat the"Let Me Count The Ways" collage wood mount stamp for making cards too, it's fun and versitale. While I was at it, here is another done with the same stamp.

I also had a lot of fun with the "From The Heart"Stamp.

Coloring in the heart & wings design will never get old for me, I just like it too much! Also cutting out the heart and attaching with foam squares is a fun touch that this stamp makes possible.


Of course this stamp was cool on my Valentine mini shelf project too.

This year, I was so much better at using other themed stamps in my Valentine card making, like this County Fair Ferris Wheel Stamp below, just adding some punched hearts and my other Valentine quote stamps made it into a fun Valentine's Day card.

The same thing goes for this Academy Stamp.

Then I moved on to Let Me Count The Ways Stickers & Mini Cutaparts for additional card making....
and even did a 8.5x11 page while I had these items out on my craft table.

All fun Valentine stuff! Hope you are enjoying Valentine's Day as much as I am. Thanks for looking and have a sweeeet day!
Kay


Thursday, February 9, 2012

Snapshot Valentine Cards


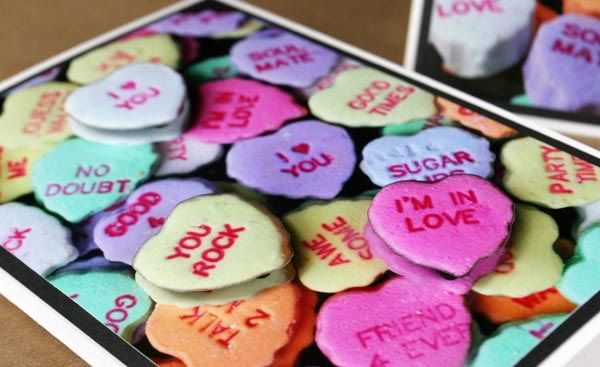
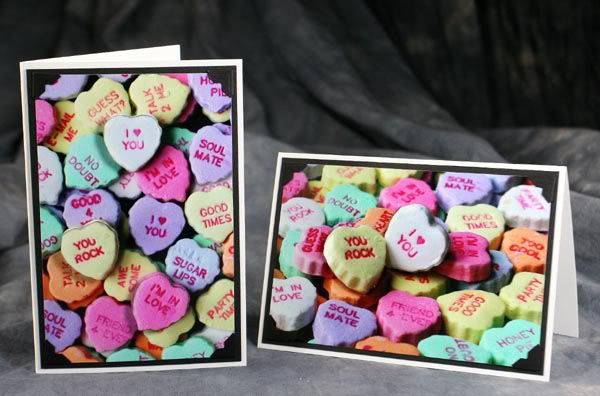
A couple photo prints converted into Valentine's Day cards seemed like a cute idea, so why not?
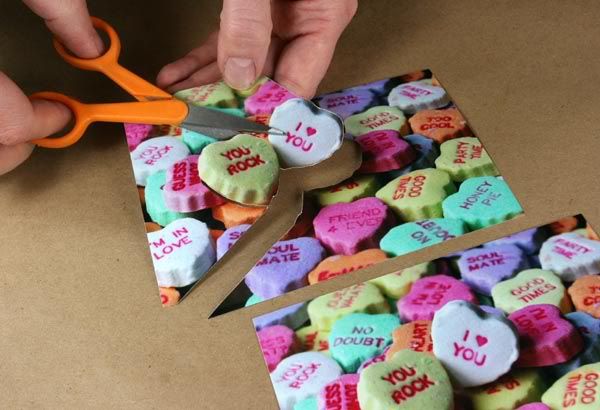
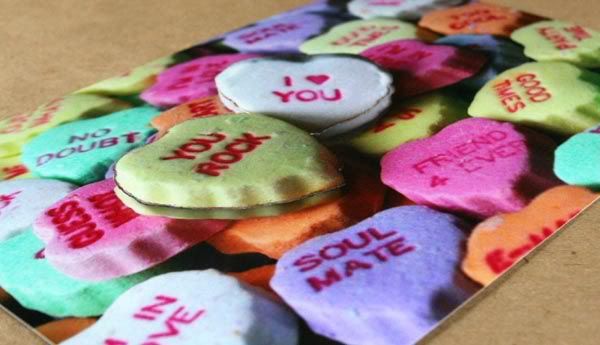
First I snapped a couple pictures of the Conversation Heart Candy that we all know and enjoy seeing this time of year, then laid them out on black cardstock near a window with natural light and took a few pictures of them.  I printed 2 each of the prints I wanted to make cards from, because I needed 2 prints of the same picture (one for the background and one for cutting up).

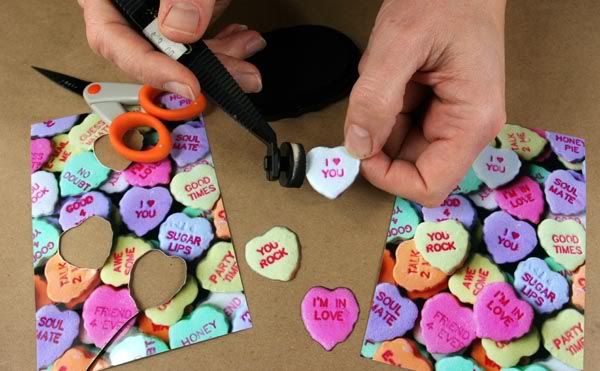
I picked out a couple hearts in the print to cut around and started trimming out.

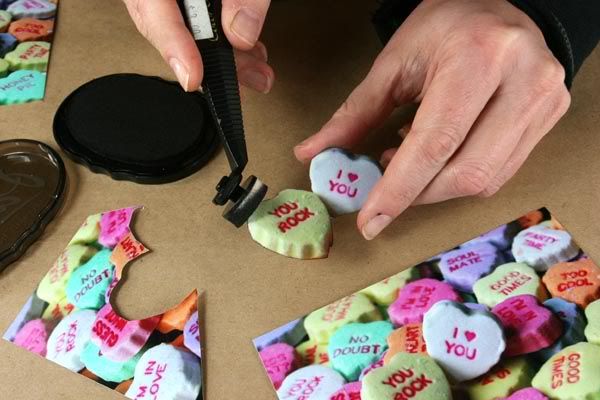
Then a little black ink on the cut edges really helps hide trimming imperfections.

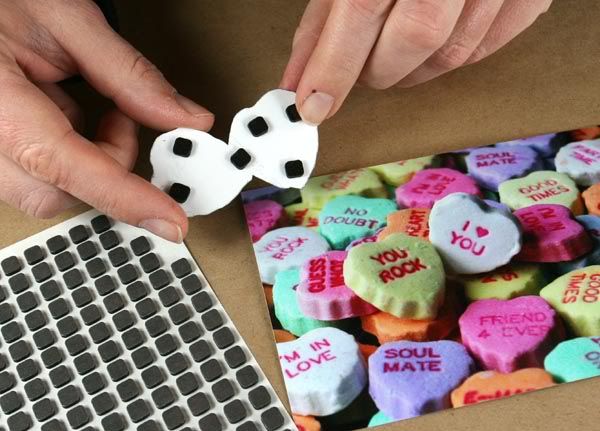
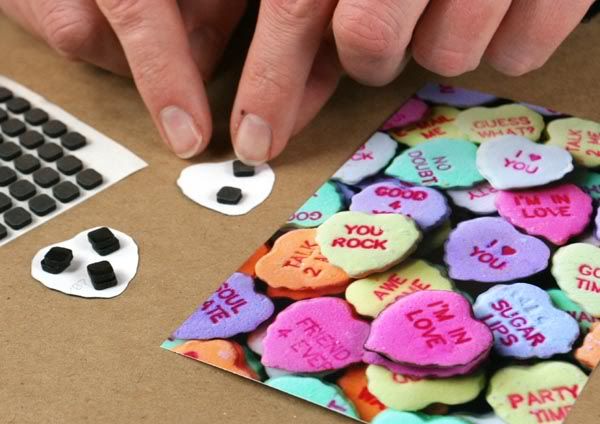
Then a couple foam squares are needed for attaching the trimmed out heart directly on top of the same hearts on the background photo. So these hearts will pop up a bit after being attached.

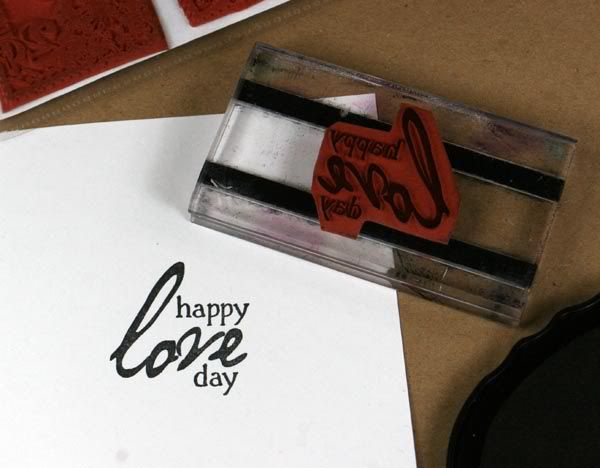
Then I matted the photo and attached onto my card, of course stamping on the inside of the card with one of Club Scraps  Love Blooms UMs.

While I was at it, what not do another?  For the next card I used a different print and trimmed out 3 hearts.


Here they are finished. Cute Valentine cards I think.

Just kind of a fun way to use your photography (and a little rubber stamping on the inside) in Valentine's Day card making. However, just looking at them makes my sweet tooth act up. Off to the candy jar (were I put all the candies after photoing them, they served two purposes here).
Thanks for looking,
Kay

Friday, February 3, 2012

Photo Transfer Onto Canvas

I've always been very interested in Photo Transfers, and all the various techniques, but never took the time to actually do one. So...it's about time!!!

Photo of my Grandparents clock transferred onto canvas then made into a mini album.
When Club Scrap's February Full Circle kit included these great 6x6 self adhesive canvas squares, I had my blank canvas and was inspired. The goodie included 4x4 book boards for wrapping the canvas around. I created this cool little mini album with mine. Assembling a Scrap Rap Article using this goodie and technique was certainly a pleasure! For more detailed instructions check it out in the Feb Full Circle Scrap Rap to see the Canvas Creations pages. But for now, since its fresh in my mind, I'm going to go on and on about it heheee.


Clock faces are just "one of those things" I enjoy, so why not take some snapshots and transfer them onto canvas? Inside this album will be photos and quotes about time, love it!

I also enjoy my snapshots of my flower garden, so it was fun to create more colorful canvas photo transfers.

Garden Picture Photo Transfer Onto Canvas

Then of course pictures of loved ones always make great keepsake projects!!

Photos of my daughter transferred onto Canvas

So a little bit about how I did it and stuff I used.
There are many photo transfer techniques and products that will do the trick, but this is what I used, Liquitex Matte Gel Medium.

First I made photo copies of my 5x7 photos, it has to be a laser photocopy done on a machine that uses toner. Keep in mine if the photo contains numbers or words, the image needs to be flipped ahead of time and copied that way, otherwise you'll have a backward number or word on your photo transfer.

Spreading a thin layer to throughly cover the canvas and making sure there are no air bubbles hidding did the trick, I really worked the photo copy onto the canvas from the center out to make sure it was adhered in all areas.

**Allow the Gel Medium to dry over night**
Spray water onto the attached photo copy, you'll notice you have enough water when you start to see the image show though. Use finger tips to roll away the moist paper revealing the image.
Continue spraying water and removing paper until the desired look is acheived.  It took me three times of re-wetting to get the paper off that I wanted. If you rub too hard, you'll remove some of the image, but that's all part of the look if you ask me:)


While I was in the middle of the mess, I thought I would do a couple at the same time.


Now the canvases are ready to be rubber stamped on, made into wall hangings, or to become covers for a mini album.

Rubber stamped photo transferred canvas.


 Wrapping Book Board with canvas.


Gluing my kettle stitched block of pages onto my cool photo transferred covers.


How much fun can one person have with a couple of canvases?!?!?! A lot I would say.

Now I have to go clean all those little pieces of rolled up paper scraps off my work space from doing all these photo transfers, a small price to pay i think. 

Thanks for looking and have a wonderful day!
Kay