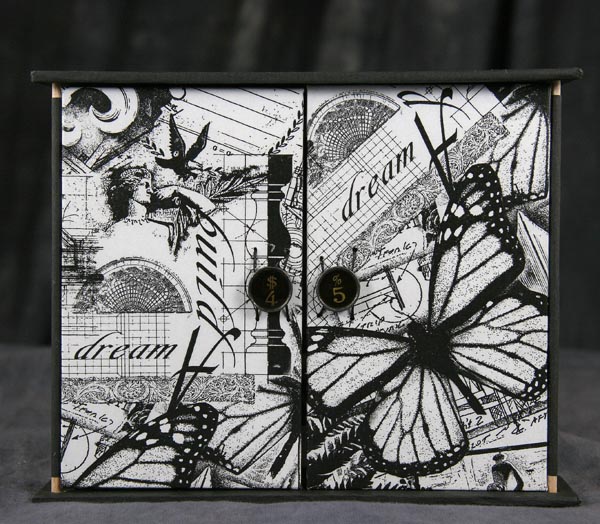
Today I bring to you my Shutter Box project. Hand crafted, of course as usual, but this time from mainly book board, cardstock and a couple of wooden dowels. So, do you want to see what's inside the box?
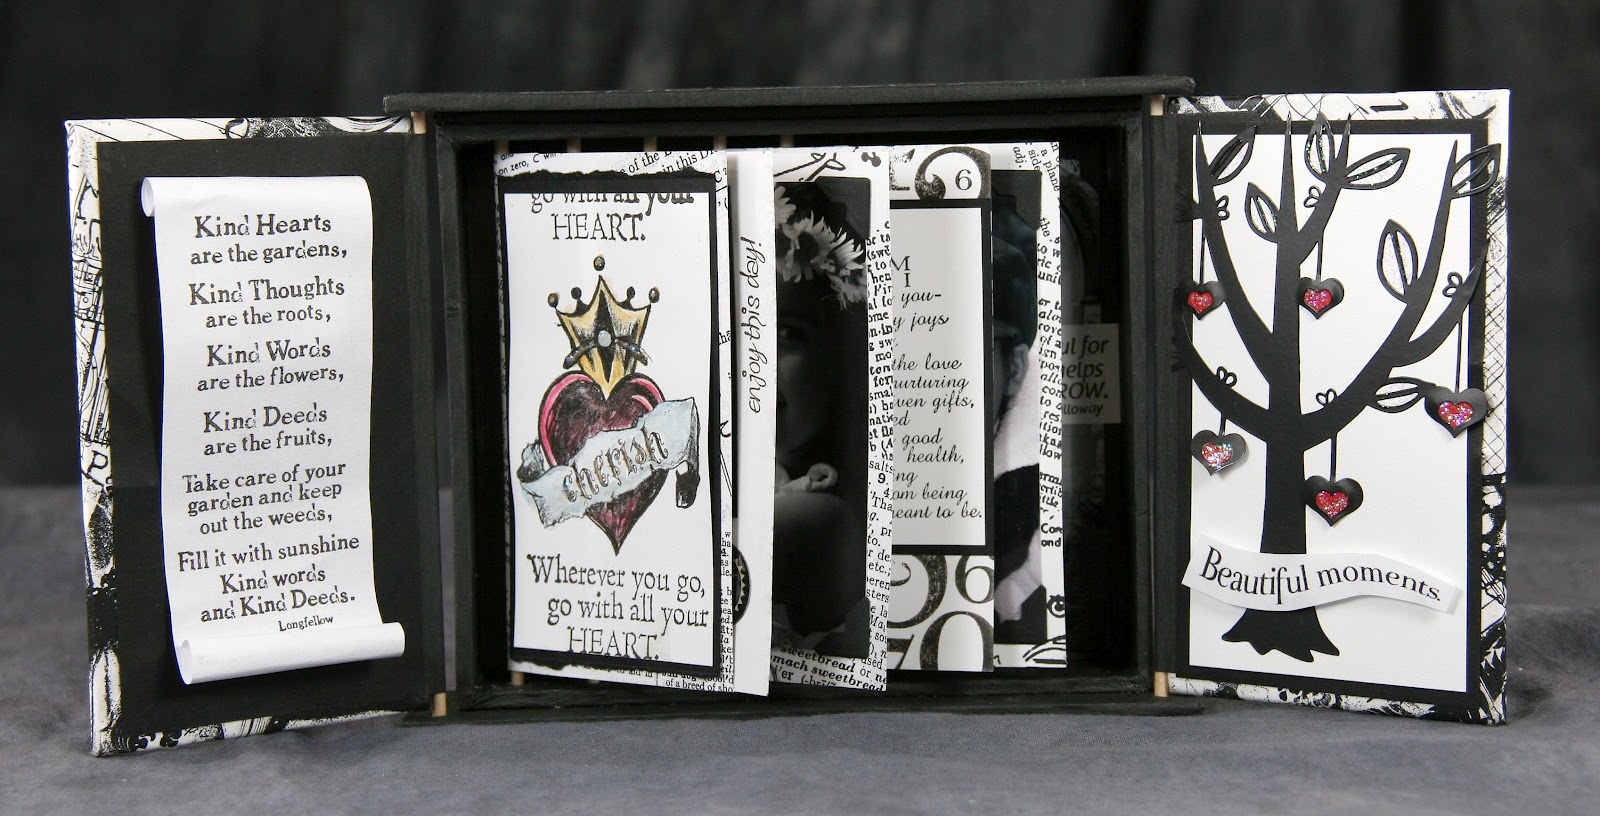
The inside holds pictures and rubber stamped quotes on five inserted pages that are attached to rotating wooden dowels.


If you are interested, here is a bit about how I assembled the shutter box. First I had to cut out my box, doors, lid and base from book board.

Then after attaching the book board to make the inside box, I wrapped it with a text weight black paper and punched holes for the wooden dowels.

I decorated my inside pages before installing them into the box frame.

Then continued to add pages.


I prepared the doors complete with a paper wrap to hold the wooden dowel that serves as a hinge.

After inserting the front doors into the holes I punched into the base, it was ready for the lid or top, the thing that basically holds the front doors in place once it's attached.


Well, after all those pictures, you get the idea of the process. We liked it so much at Club Scrap that we decided to make it the September Serenity Club Stamp Project. Making this into a kit with instructions makes the project so much easier since all the book board and paper are already cut to size. That is precisely the reason I made another! Here is the project the kit makes with the Serenity papers included (however the kit is also available without paper, so you can just use your own favorite papers).


I think I'll leave you with that, hoping you like the project. It sure was fun to figure it out and make more than one of!
Thanks for stopping by Kay's Keepsakes!
Enjoy your day,
Kay
Kay this project is absolutely drop dead gorgeous, as are all of your projects! :)
ReplyDeleteI love the unique way it is assembled! And that collage paper on the front is spectacular. Did you create it just for this project?
Thanks so much Julie. I did do a rubber stamped collage sheet for the outside wrap, and then a collage of printed dictionary pages paper for the inside pages, and hoping to get them printed - enough prints of those two sheets to make available in Club Scrap's "Gotta Have More Dept" but will have to see how things go, they would be handy to have for wrapping projects I'm thinking :)
ReplyDeleteFantastic project, Kay! Your creativity never ceases to amaze me, my friend. Thanks for the awesome tutorial!
ReplyDeleteSo glad Tricia and I made time for taping this project, so here are the details and how to make it using the kit we created for this project at Club Scrap: http://vimeo.com/50107983
ReplyDelete